
Introduction:
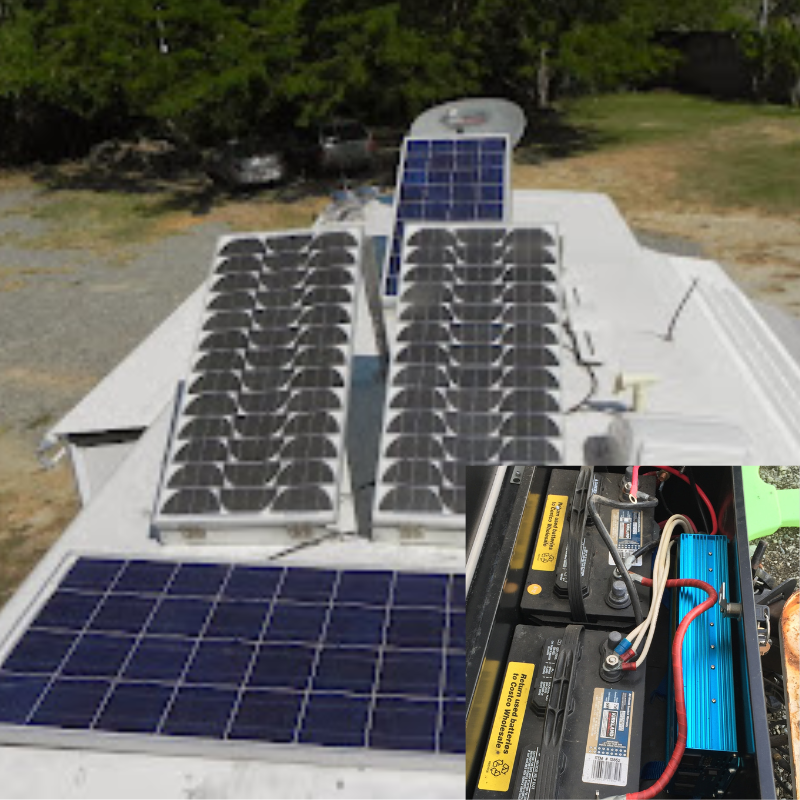
Installing a 3000W inverter in your vehicle, RV, or off-grid system can significantly enhance your power capabilities, allowing you to run high-wattage appliances like microwaves, power tools, or even small air conditioners. However, a successful installation depends on choosing the correct wire size and fuse to ensure safety and efficiency. In this blog, we’ll guide you through the process of selecting the right components for your 3000W inverter setup.
1. Understanding the Basics
A 3000W inverter is a powerful device that converts DC power from your battery into AC power for your appliances. To handle this level of power, the wiring and fusing must be carefully selected to prevent overheating, voltage drop, and potential fire hazards.
2. Calculating Wire Size
The wire size is critical because it determines how much current can safely flow through the system without overheating. For a 3000W inverter, follow these steps:
Step 1: Determine the Current Draw
- Use the formula: Current (Amps) = Power (Watts) / Voltage (Volts).
- For a 12V system: 3000W / 12V = 250A.
- For a 24V system: 3000W / 24V = 125A.
- If you want to learn more about big power system setup also can use our below solar calculation tool
- Solar Calculation Tool https://heargrow.com/new-tools/
Step 2: Choose the Correct Wire Gauge
- Refer to a wire gauge chart to find the appropriate size based on the current and wire length.
- For a 12V system with a 250A draw:
- Up to 10 feet: 2/0 AWG (00 gauge).
- 10-15 feet: 3/0 AWG (000 gauge).
- For a 24V system with a 125A draw:
- Up to 10 feet: 4 AWG.
- 10-15 feet: 2 AWG.
Step 3: Consider Voltage Drop
- Longer wire runs increase resistance, leading to voltage drop. To minimize this:
- Use thicker wires for longer distances.
- Keep the wire length as short as possible.
3. Selecting the Right Fuse
A fuse protects your system from overcurrent, which can damage the inverter or cause a fire. Here’s how to choose the right fuse:
Step 1: Determine the Fuse Rating
- The fuse should be rated slightly higher than the maximum current draw.
- For a 12V system: Use a 300A fuse (to handle the 250A draw with some margin).
- For a 24V system: Use a 150A fuse (to handle the 125A draw with some margin).
Step 2: Choose the Fuse Type
- Use an ANL fuse or MRBF fuse, which are commonly recommended for high-current applications like inverters.
- Ensure the fuse holder is rated for the same current as the fuse.
4. Installation Tips
- Battery Connection: Use high-quality, corrosion-resistant terminals and ensure all connections are tight.
- Wire Routing: Route wires away from sharp edges, heat sources, and moving parts to prevent damage.
- Grounding: Connect the inverter’s ground terminal to the vehicle or system chassis using a wire of the same gauge as the positive wire.
- Ventilation: Ensure the inverter has adequate airflow to prevent overheating.
5. Safety Considerations
- Overloading: Avoid exceeding the inverter’s rated capacity (3000W). Check the power requirements of your devices before connecting them.
- Short Circuits: Double-check all connections to prevent short circuits, which can damage the inverter or cause a fire.
- Regular Inspections: Periodically inspect the wiring, fuse, and connections for signs of wear or damage.
6. Tools and Materials Needed
- Wire: 2/0 AWG or 3/0 AWG for 12V systems; 4 AWG or 2 AWG for 24V systems.
- Fuse: 300A for 12V systems; 150A for 24V systems.
- Fuse Holder: Compatible with the chosen fuse type.
- Crimping Tool: For securing wire terminals.
- Heat Shrink Tubing: To insulate connections.
- Multimeter: To test voltage and connections.
7. Example Setup
12V System:
- Inverter: 3000W.
- Wire: 2/0 AWG (up to 10 feet).
- Fuse: 300A ANL fuse.
- Fuse Holder: 300A rated.
24V System:
- Inverter: 3000W.
- Wire: 4 AWG (up to 10 feet).
- Fuse: 150A ANL fuse.
- Fuse Holder: 150A rated.
8. Frequently Asked Questions (FAQs)
Q1: Can I use a smaller wire size to save money?
- No. Using undersized wires can cause overheating, voltage drop, and potential fire hazards. Always use the recommended wire size.
Q2: What happens if I don’t use a fuse?
- Without a fuse, an overcurrent situation could damage your inverter, battery, or wiring, and even cause a fire.
Q3: Can I install the inverter myself?
- Yes, if you have basic electrical knowledge and the right tools. However, if you’re unsure, consult a professional to ensure a safe installation.
Conclusion: Power Your Adventures Safely
Installing a 3000W inverter can unlock a world of possibilities, but it’s crucial to choose the right wire size and fuse to ensure safety and performance. By following the guidelines in this blog, you can confidently set up your inverter and enjoy reliable power wherever you go.
Call to Action:
Have you installed a 3000W inverter in your vehicle or off-grid system? Share your tips and experiences in the comments below! If you have any questions, feel free to ask—we’re here to help!

Reference:TenOCNomad https://community.goodsam.com/discussions/rvmusthaves/installing-3000-w-inverter-%E2%80%93-wire-size-%E2%80%93-fuze-size/3636786


