1. Solar Controller Low Voltage Protection Triggered Despite Normal Voltage
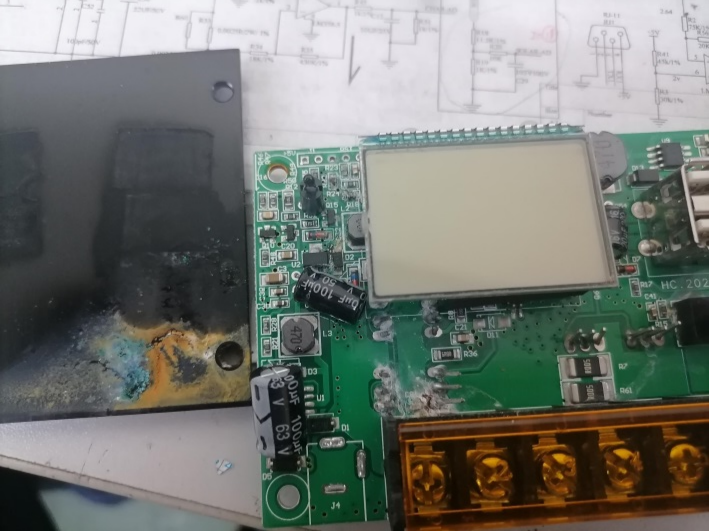
Cause Analysis: The copper strips at the terminal posts are visibly burnt out, which likely indicates improper use by the customer, such as a load short circuit.
2. Insufficient Voltage Under Normal Conditions
Cause Analysis: The damage appears to be severe and irreparable, with signs suggesting water ingress.

Solar Controller: https://heargrow.com/product/heargrow-20a-12v-24v-pwm-solar-controller-for-rvs-trailers-campers-vans-boats-off-grid/
3. Incomplete Display
Cause Analysis: There is evidence of cold solder joints (poor connections during soldering).
4. Light Control Mode Ineffective
Cause Analysis: MOSFET Q5 has failed.
5. Screen Display Issues and Malfunction in Charging/Discharging
Cause Analysis: There are cold solder joints affecting the display screen. The discharge indicator does not show due to these cold joints. Damage to MOSFET Q5 impacts the charging function.
6. No Output to Load for CMTD Model
Cause Analysis: The wiring for the load has been burnt out, possibly due to excessive load current.
7. Automatic Restart Despite Normal Voltage on Two Units
Cause Analysis: The main microcontroller chip is damaged.
HearGrow Product Introduction
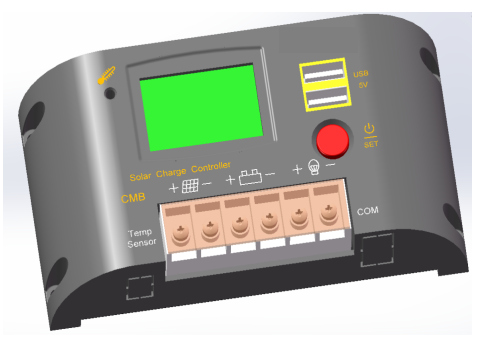
The CMB series LCD controller is an intelligent, multi-purpose solar charge and discharge controller with adjustable control parameters to fully meet your diverse application needs.
This controller features PV-Power technology, enabling initiation from either the solar panel or battery side. Even when the battery is severely under-voltage, the solar panel can attempt to charge it; this product can also be used directly as a charger. It has the following characteristics:
How to Use the CMB Series LCD Controller
The usage of the CMB series LCD controller is relatively straightforward, but specific steps may vary depending on the model and particular features. Below is a general guide:
- Installation:
- Ensure that the solar panel, battery, and load devices are correctly connected. Pay attention to check if the wiring is correct, especially not to reverse the positive and negative poles to avoid damaging the device.
- Parameter Settings:
- Enter the setup mode via the buttons or touch interface on the controller.
- Set the system voltage (auto-recognition or manual selection) and configure settings according to your battery type (e.g., lead-acid or lithium battery).
- Configure charging modes (such as intelligent PWM charging), day start/night shutdown modes, and light control or time control modes.
- Operation Monitoring:
- The LCD display on the controller will automatically switch to show different operating statuses, including battery charge level, charge/discharge current, system voltage, etc.
- Monitor the system’s operation status, such as overload and short-circuit protection, to ensure stable system performance.
- Maintenance and Care:
- Regularly check for loose or damaged connection wires.
- Adjust control parameters as needed, such as adjusting the temperature compensation function in different seasons, to optimize system performance.
- Safety Precautions:
- Always disconnect the power before performing any connection or disconnection operations to avoid the risk of electric shock.
- If you are unfamiliar with electrical work principles, it is advisable to seek help from professionals.
- The specific parameter settings of the CMB series LCD controller are extensive, designed to meet the needs of various application scenarios. Below is a detailed explanation of its main configurable parameters:
- System Voltage Settings:
- Automatic Recognition or Manual Selection: Automatically recognize or manually select system voltage (such as 12V, 24V, 48V, etc.) to match the type and specifications of the battery being used.
- Charging Mode Settings:
- Intelligent PWM Charging Method: Optimizes the charging process to extend battery life.
- Adjust charging parameters as needed, such as float charge voltage and equalization voltage.
- Light Control and Time Control Modes:
- Light Control Mode: Set to automatically turn on or off load devices at specific light intensity levels.
- Time Control Mode: Supports setting device operating states according to time periods, such as starting during the day and shutting down at night.
- Temperature Compensation Function:
- Automatically adjusts charging voltage based on ambient temperature to ensure optimal charging conditions for batteries under different temperature environments.
- Battery Type Selection:
- Supports selection between lead-acid and lithium batteries, automatically adjusting corresponding charging parameters based on the chosen battery type.
- Protection Function Settings:
- Battery Under-voltage Protection: When the battery voltage drops below a set value, the system will automatically cut off the load to protect the battery.
- Overload and Short Circuit Protection: Prevents system damage due to excessive current.
- Battery Reverse Connection Protection: Avoids equipment damage caused by incorrect connections.
- Display Interface Settings:
- Automatic Switching Display Interface: Automatically switches display content based on different working states, providing real-time information feedback.
- Dual USB 5V Output Settings:
- Provides two 5V USB output ports for charging mobile phones or other low-power devices.
- Other Settings:
- Additional functions can be configured as needed, such as alarm thresholds and recovery voltage.
- For the most accurate and detailed parameter setting information, it is recommended to consult the user manual or product specification document https://heargrow.com/product/heargrow-20a-12v-24v-pwm-solar-controller-for-rvs-trailers-campers-vans-boats-off-grid/for the specific model. These documents typically include detailed steps and recommended values for each setting option, helping users configure the best settings based on their actual application needs. If you need further assistance or have more specific questions, feel free to ask.


